Category Archives: Stuff I have made for my son

R2-D2 Revival: Hacking a Vintage Star Wars Light into an IoT Device

A 10-Year-Old R2-D2 Light

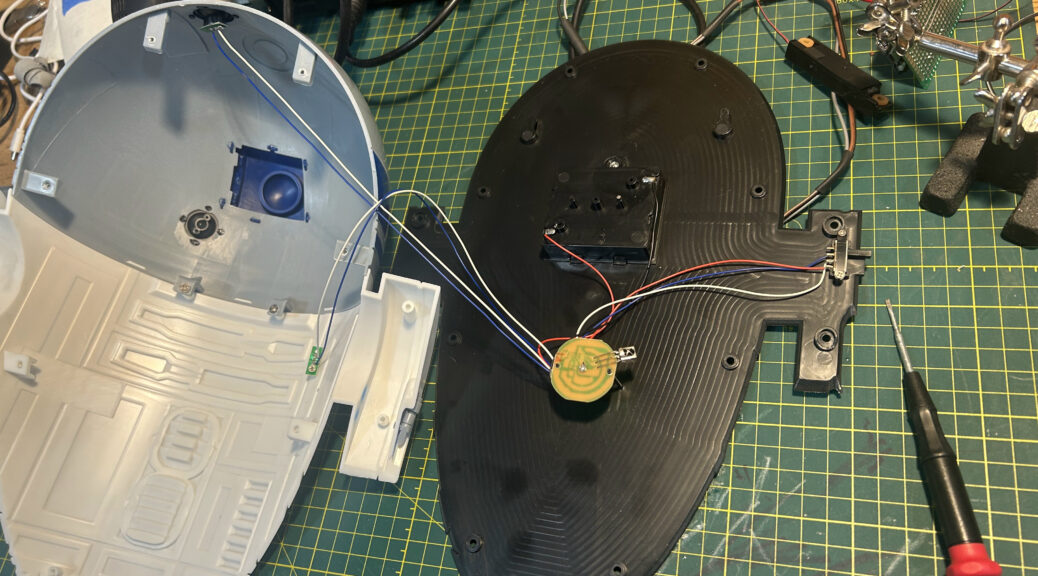
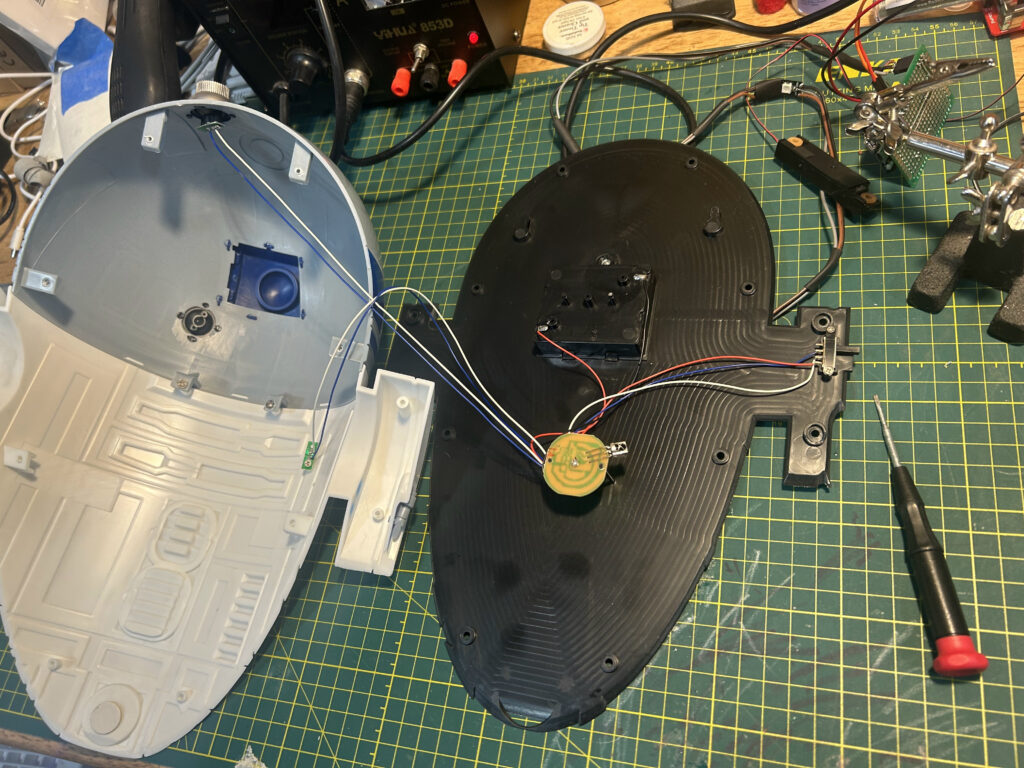
A decade ago, my wife gifted me what looked like a charming 3D Light FX Star Wars R2-D2 3D-Deco LED Wall Light (yes, that was the name). I never mounted it to a wall, I just had it resting on a shelf waiting for a good moment. When I finally decided to mount my R2-D2 light in 2025, I was disappointed by its basic capabilities. The internal inspection revealed a simple circuit board containing only an infrared sensor, two basic LEDs, and a manual switch. This minimalistic approach, while charming, left much to be desired.

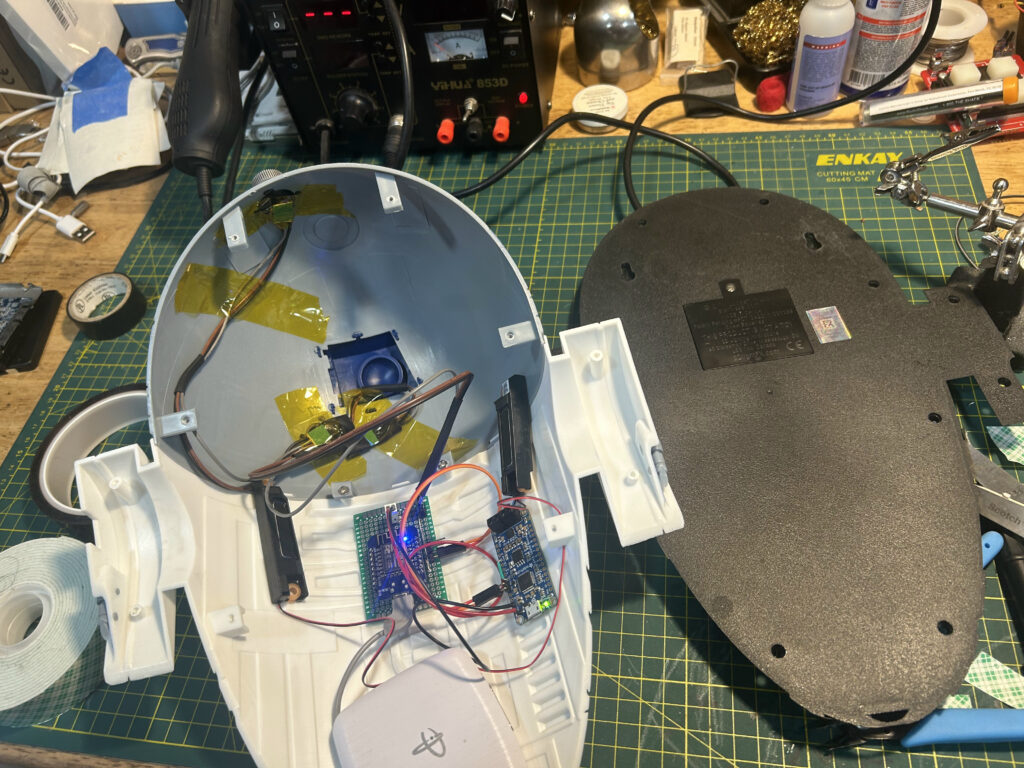
Full Hardware Overhaul

This wasn’t going to be a simple upgrade. The original board was not worth keeping, so I decided to gut it completely. Here’s what I installed:

LED System: Three WS2812B addressable RGB LEDs controlled by an ESP8266. These provide the classic R2-D2 with RGB lighting effects with full color control.

Audio System: A Adafruit Audio FX Sound Board with 2x2W amplifier and 16MB storage for WAV/OGG audio files. This handles the authentic R2-D2 sounds with crystal clear audio quality.

Smart Control: The ESP8266 runs custom Arduino firmware that connects to WiFi and listens for MQTT commands. This allows integration with my smart home ecosystem.

Implementation

The Arduino code running on the ESP8266 handles multiple tasks simultaneously:

  • WiFi connection management
  • MQTT protocol for external control
  • WS2812B LED sequencing and color effects
  • Audio trigger management through the Adafruit board

The Arduino code manages LED color sequences, intensity variations, and audio playback synchronization. Each sound trigger is carefully timed to match the visual effects, creating an immersive experience that captures the essence of the beloved astromech droid.

The true magic lies in the integration with my existing smart home infrastructure. Other systems can now trigger specific R2-D2 responses based on:

  • Motion detection from security cameras
  • Scheduled calendar events
  • Random sound and lighting effect triggers to simulate R2-D2’s intermittent consciousness, due to damage.

What started as a simple wall light is now a sophisticated IoT device. The transformation took about a weekend of work, but the end result is worth every minute.

Hardware Summary:

  • ESP8266 (NodeMCU clone)
  • 3x WS2812B LEDs
  • Adafruit Audio FX Sound Board + 2x2W Amp with 16MB of storage
  • Standard USB power supply

Dark detector…

My son asked me, “Dad, can we make a circuit that turns a light on when it is dark?”… Went to the parts drawers, got some stuff together, drew up the circuit and he put it together on a breadboard. Notice the new breadboard, had to order some from Amazon as I ran out of them.

play-sharp-fill

A Counter using a 555 Timer

So my son wanted to expand the functions of the circuit we put together. He asked if we could make it count by itself and then proceeded to show me how it does this on his laptop… Ok, went through the parts drawers again and found suitable replacements for the parts needed (555 is the main thing). I drew up the design for the circuit and he put it together.

play-sharp-fill

A simple counter circuit

So my son was playing on his laptop and found a circuit simulation program that is part of GCompris (Open Source Educational software). He “desgined” a simple counter on it, when I saw what he made I asked him if he wanted to make it with real parts… He said yes. A bit of searching in my spare parts drawers and we had resonable substitutions to build a circuit that could count. Yes, he put it together on the breadboard, following the diagram (adapted to the parts we had on hand). See his creation… Next planned upgrade is to make it count by itself (555 timer to the rescue).

Lego Batman — Making the minifigure look more like it does in the movie

My son has a fascination with Lego Batman.  Ok, I may have a bit to do with his fascination with Lego Batman, I’m the one that taught him to play it on our very old (but still functional) Wii.  When the Lego Batman movie came out we took him to see it and in the days after my wife got him several minifigres related to it.

Looking at the Batman minifigure, it irked me a bit that in the Lego Batman Movie, Batman’s eyes look like they light up, but the real Lego minifigure does not have light up eyes. Since my wife managed to score more than one Batman minifigure I decided to “enhance” one of them to look more like the movie.

The process was crude and simple.  I basically cut a slit into the head of the minifigure using the dremel.  The slit is in the same general area where the cut-outs for the eyes on Batman’s mask line up.  I then proceeded to grind down a blue LED to fit into the minifigure’s head.  The only reason I chose to use a blue LED is because I have a bunch of them left over from other projects.

Once the LED was stuffed into the head and light was shining out from the slit, it was time to make some hole in the minifigure’s body to accommodate the wires to power the LED.  Initially I thought of just stuffing a small battery into the minifigure’s chest, I quickly gave up on that idea (not much room in there).  Instead I ran wires down a hole I drilled into the “neck ” of the minifigure, then down a hole I drilled into one of the hips and finally out through the bottom of one of the legs into a hole I also drilled into a Lego brick.  The next step is building a small power supply to stuff into the Lego brick (although I may end up using more than one).

Overall the effect is close to what is seen in the movie [insert picture].  Of course the minifigure is no longer useful as a toy…  It is now more of a “showpiece”…

Lego Batman

Marquee Letters and a 555

I actually made this a while ago, but now I finally have some time to post about it.  This whole endeavor started with my wife picking up a set of marquee letters on clearance.  They are basically letters made out of white plastic with LEDs on them.  Construction wise, they are “OK”, the plastic is sturdy enough and the LEDs are bright.  But I was disappointed because the lights did nothing special, they just powered on.

I took a look at my parts drawer to see what I had available to make something more interesting out of these marquee letters.  There were a couple of microcontrollers, some decade counters, resistors, capacitors and quite a few 555 timers (I must have picked up a bunch on clearance somewhere, because I have a lot of them).  Initially I though of using one of the microcontrollers to animate the lights, then I came to my senses.  The 555 timer and a decade counter are the right tools for this job, no need to whip out a microcontroller.

The circuit was simple enough (you can search Google for LED chasers using 555 and pick one) .  I had no issues putting it together and it makes for a good simple light show.  Now off it goes into our son’s room to eat away batteries and amuse him. See video below.

play-sharp-fill